1. Enable the Play Developer API
In order for our servers to communicate with Google on your behalf you need to provide a set of service credentials.
First, your Play Developer account needs to be linked to a Google Developer Project. From there will create a service account and grant Financial permission to it. Finally, we’ll setup the service account credentials in iaptic.
It takes more than a few steps, be ready for somewhere around 10-15 minutes of form filling.
1.1 Create a Service Account
Let's configure access to the Google Play Developer API through the Google Play Console. The below provides a curated version of Google's own documentation.
Make sure Google Play Android Developer API is enabled in your Cloud console, in the section APIs & Services.
- In the Google Cloud Console go to Service Accounts.
- Click Create service account.
- Fill in the form (set name and description to whatever suits you)
- Select the Role: Project › Owner
- You can ignore the grant access section
- Then click Continue
- Click "Actions -> Manage Keys" to create a Key > format JSON
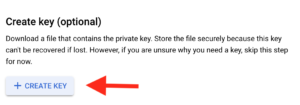

- This will download a JSON file on your computer. Keep it safe.
- Finalize by clicking Done.
1.2 Setup account permissions
You can now close the Developer Console and come back to the Play Console.
- Go to the Users & Permissions page on the Google Play Console.
- Click Invite new users (it's hidden in the "..." menu).
Put the email address for your service account in the email address field and grant the necessary rights to perform actions:
- View financial data, orders, and cancellation survey responses
- Manage orders and subscriptions
1.3 Save the credentials in your Iaptic account
Back to your iaptic settings, copy-paste the content of the JSON document into the Google Play Service Account field and Save.

Important!
It can take up to 24 hours for your Play Service Credentials to work properly with the Android Developer API.
There is a trick that can force a refresh of Google’s access rights. Create a new dummy In-App Product in the Google Play Console, you can remove it later.
2. Enable Real-time developer notifications for your app
To prevent any lag in the detection of renewal, cancellations or other potential changes to subscriptions and purchases statuses, Google provides a server-to-server notification mechanism. We will setup it up with a few more steps.
A quick explanation:
- The Pub/Sub API is a service from Google Cloud that lets applications send messages to each others. It’s used by Google Play to send real-time notifications.
- In this API:
- a Topic is a collection of messages and permissions. Some users are allowed to publish messages to the topic, some user are only allowed to read messages.
- a Subscription gives access to a Topic. A type of subscription called “push” subscription” will call a webhook when a message is published.
- In our context, messages will be purchase related events.
We will now:
-
- Enable the API for your project
- Create a Topic where “Google Play” can publish messages.
- Create a Subscription that calls Iaptic’s dedicated endpoint.
- Tell “Google Play” what Topic to publish to for your app.
2.1. Enable the Pub/Sub API
You must have a Google Cloud Project with the Cloud Pub/Sub API enabled.
- Click here to enable the Pub/Sub API from the Google Cloud Console.
- Click “Setup a Project”.
- Select the project you created earlier (Create a Service Account, Bullet 3).
If you didn’t change the defaults it has been called “Google Play Android Developer” - Click the Enable button.
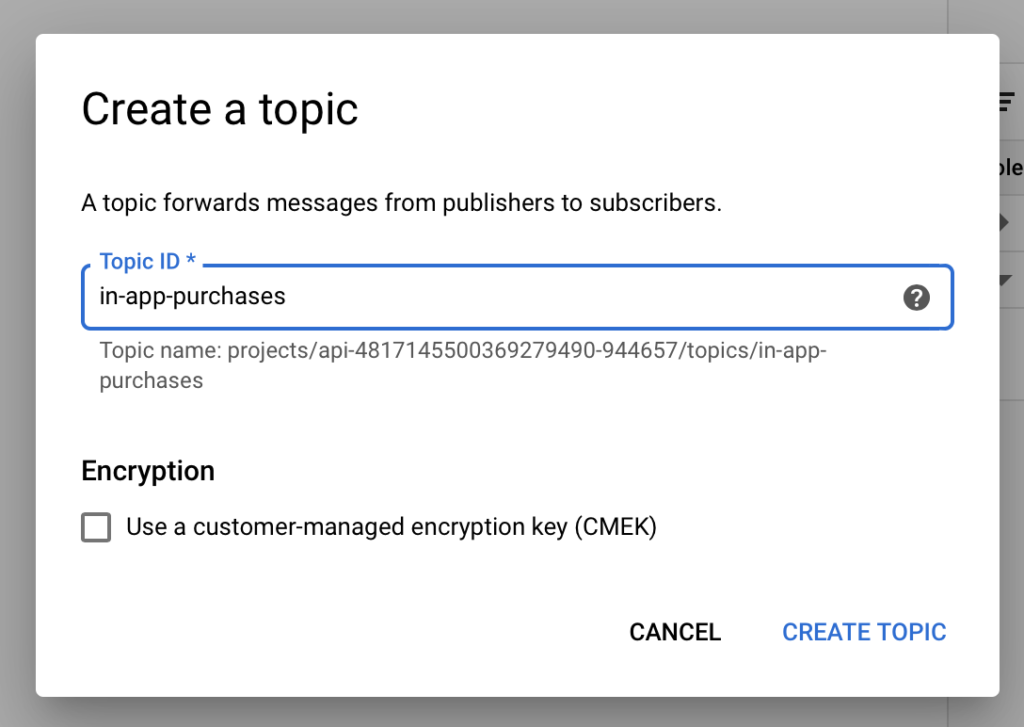
2.2. Setup a Topic
From the Google Cloud console, Create a Topic with an ID of your choice (link: https://console.cloud.google.com/cloudpubsub/topicList)
- Make sure the correct project is selected

- Click Create Topic

- You can keep “Use a customer-managed encryption key (CMEK)” unselected.
Give Google Play the permission to send messages to this topic:
- Select the Topic you just created
- Open the “Permissions” tab
- Click “ADD MEMBER“.

- Then fill in the form with those values:
- Member: [email protected]
- Role: Pub/Sub Publisher

- Save
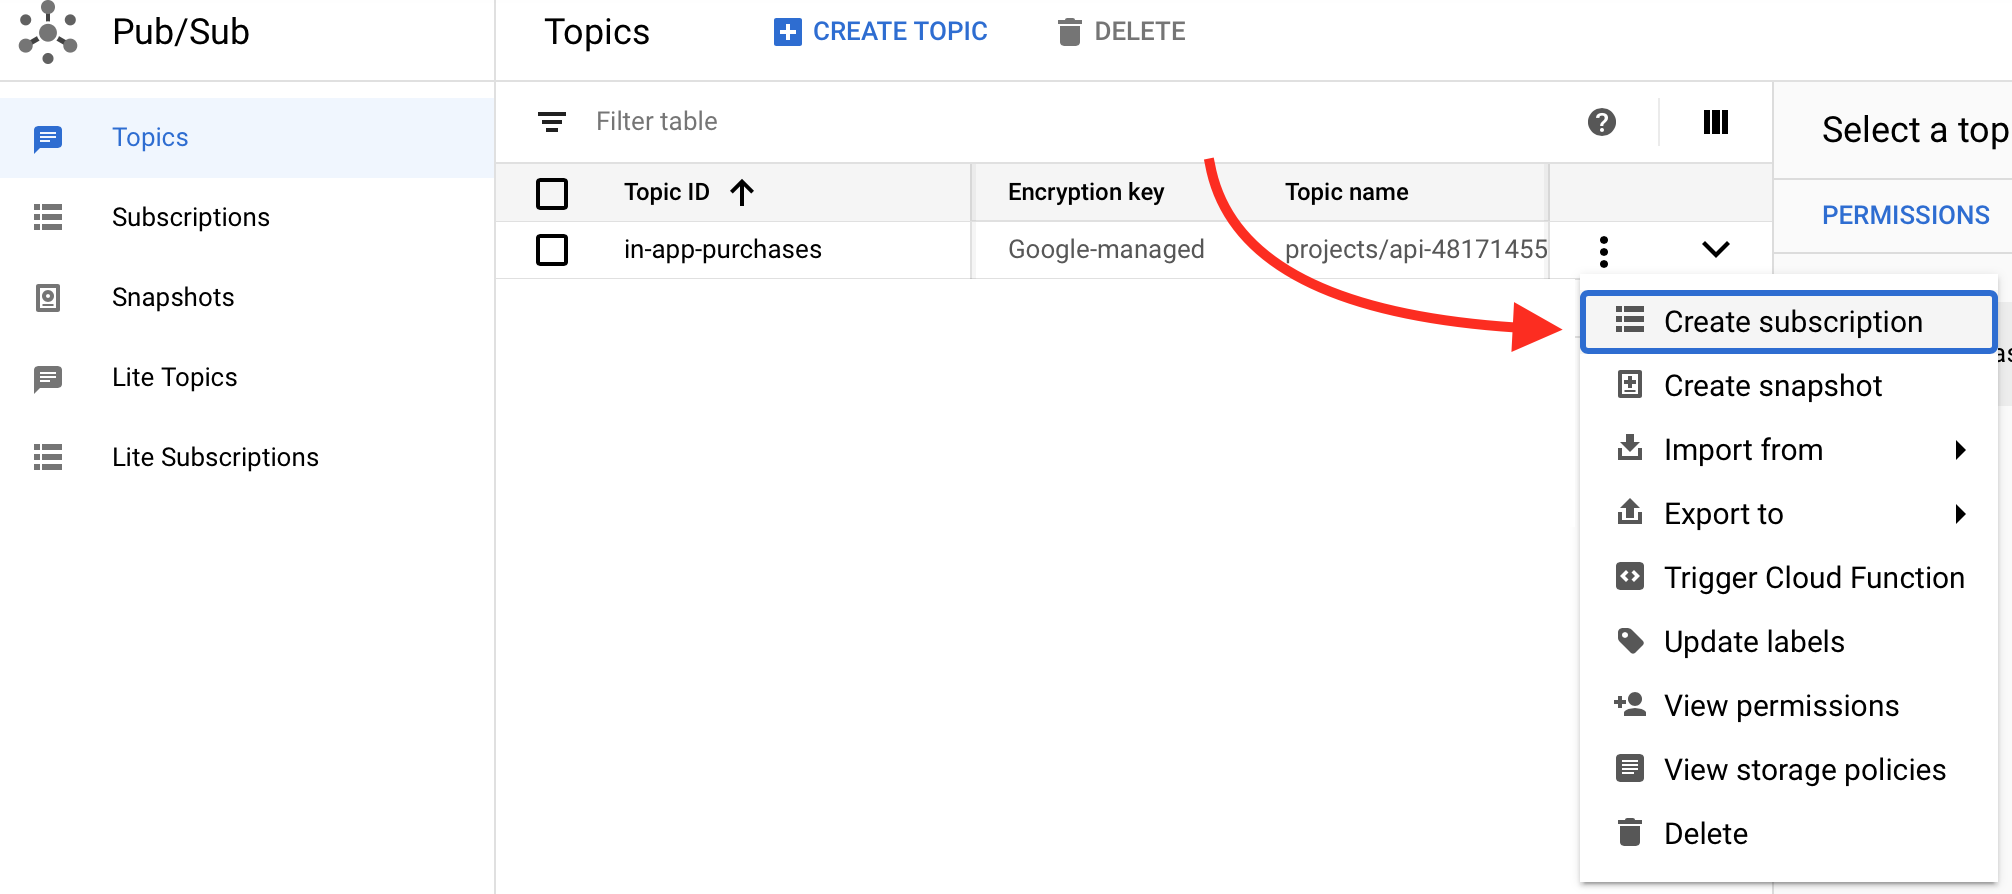
2.3. Create a Subscription
We will then add a Subscription to this Topic.
- From the Topics page, open the contextual menu for your newly created Topic and select “Create subscription“.
- Fill in the details.
- Subscription ID: it’s up to you.
- Delivery type: Push
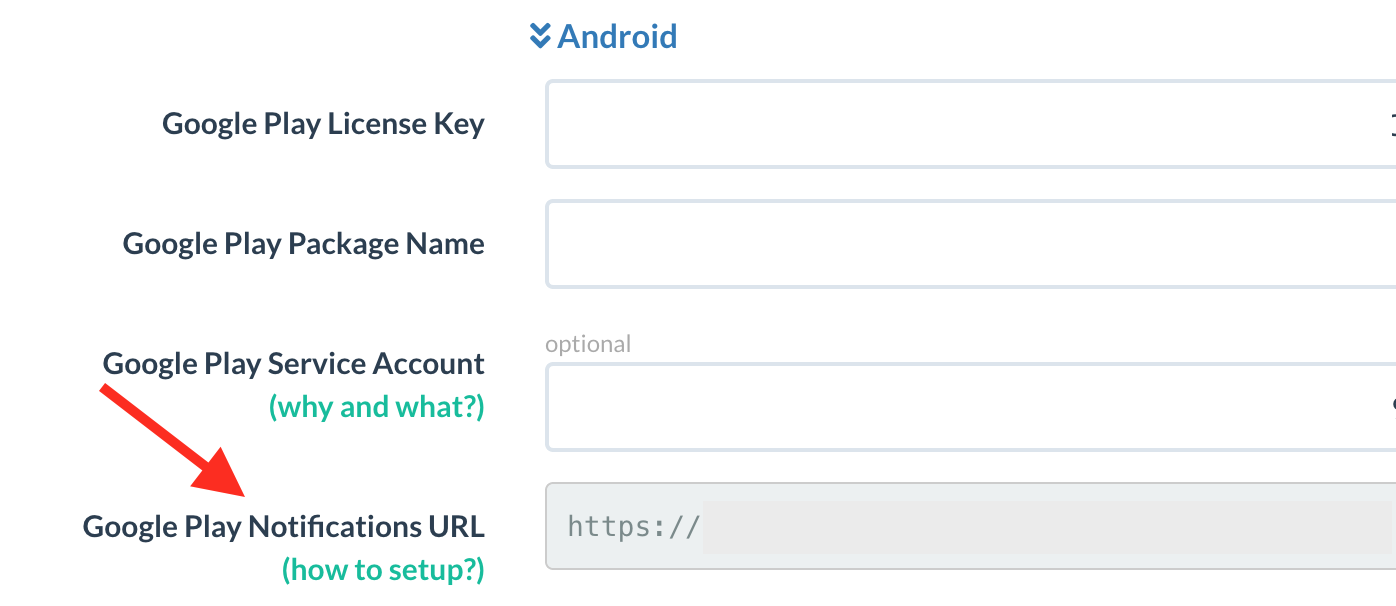
- Endpoint URL: to be retrieved from your Iaptic Settings.
- Expiration: Never expires
- Retry policy: Retry after exponential backoff delay
- Min: 10
- Max: 600
- Here how this will look like:
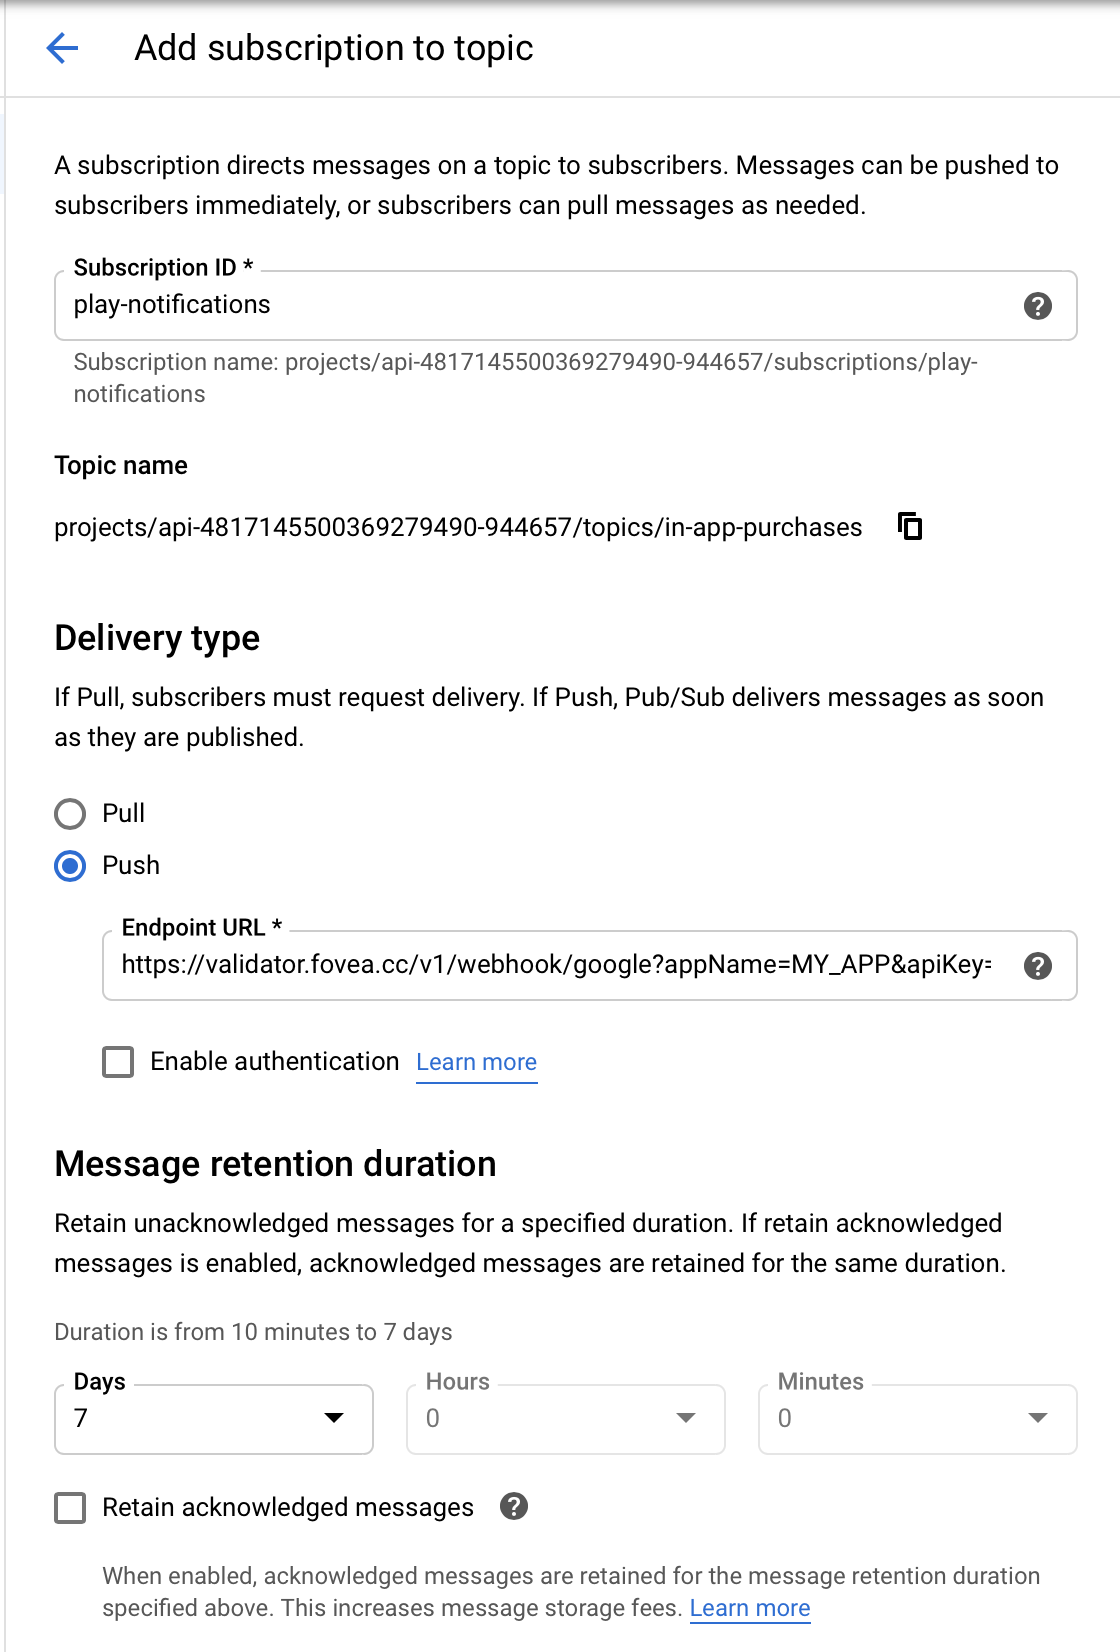
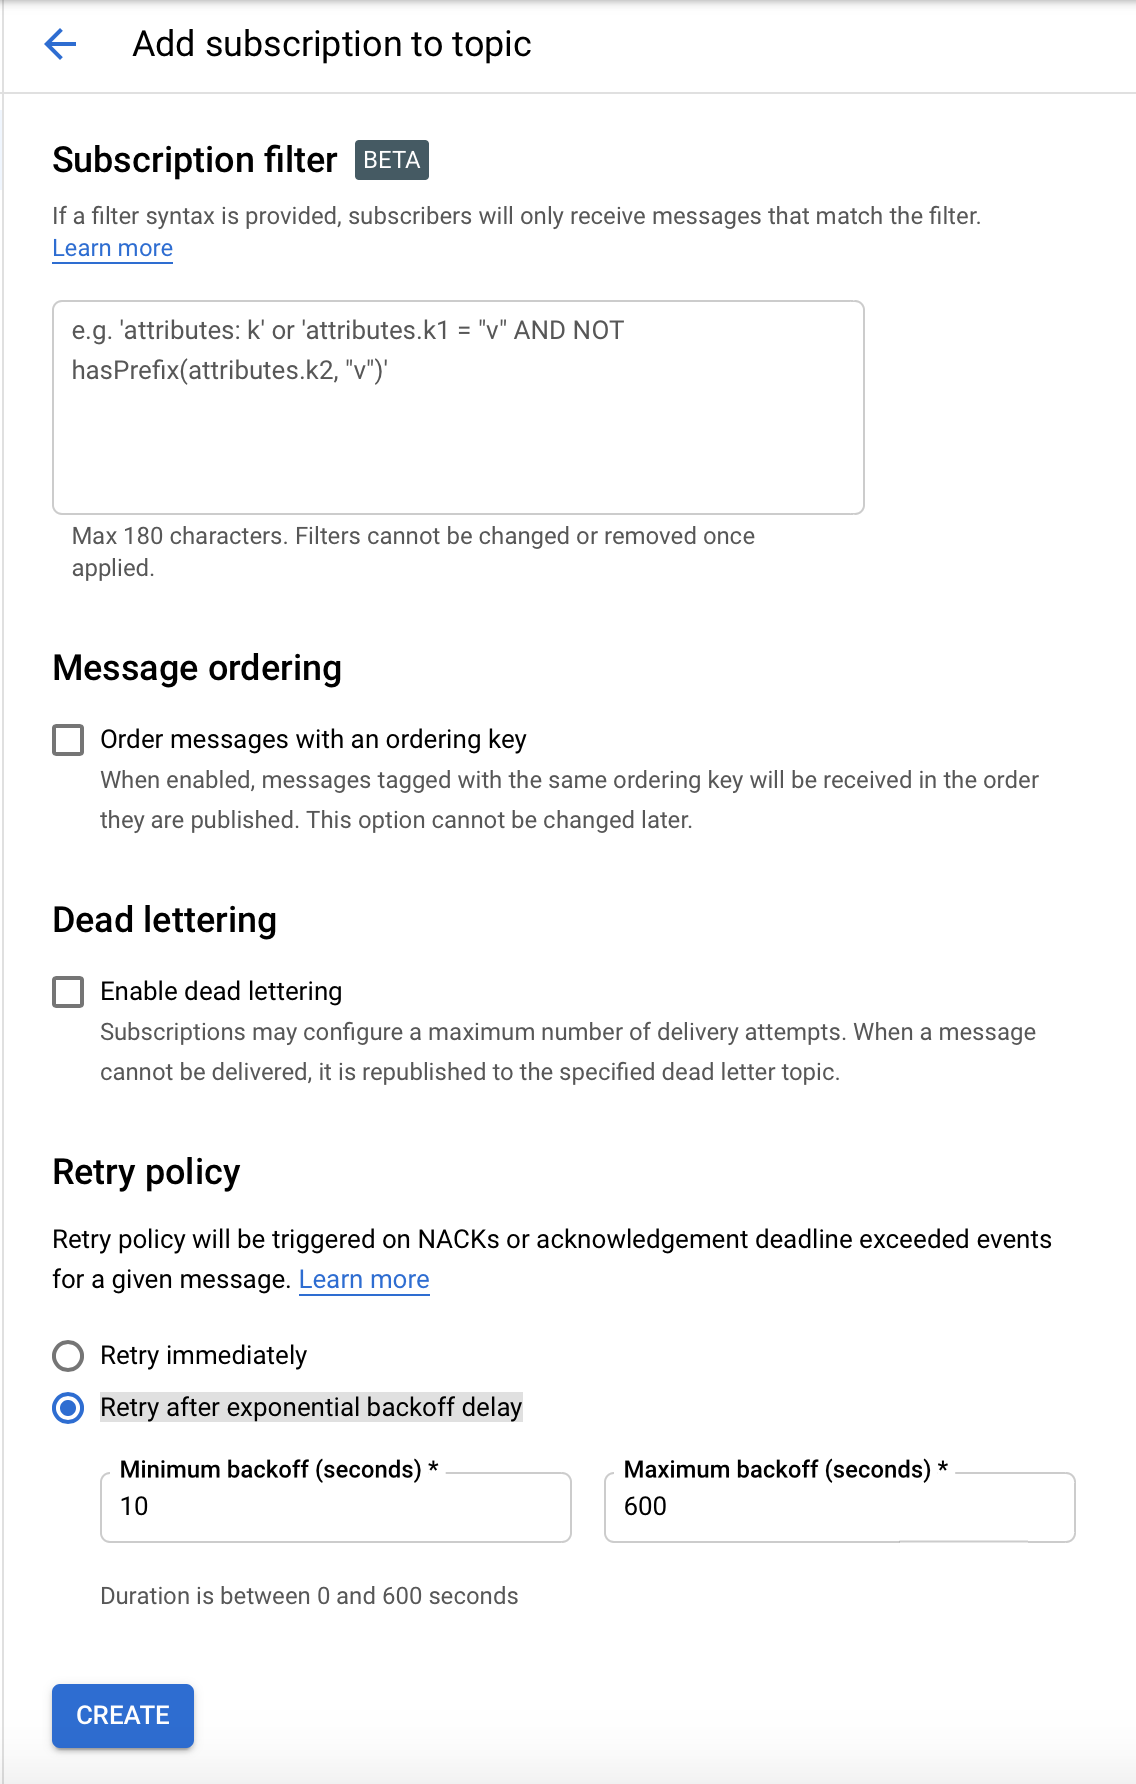
- Click Create to confirm.
2.4. Link with Google Play
We will now link this subscription to Google Play.
- Open the Google Play Console.
- Select your app.
- Go to Monetize > Monetization Setup (it’s at the very bottom of the sidebar menu).
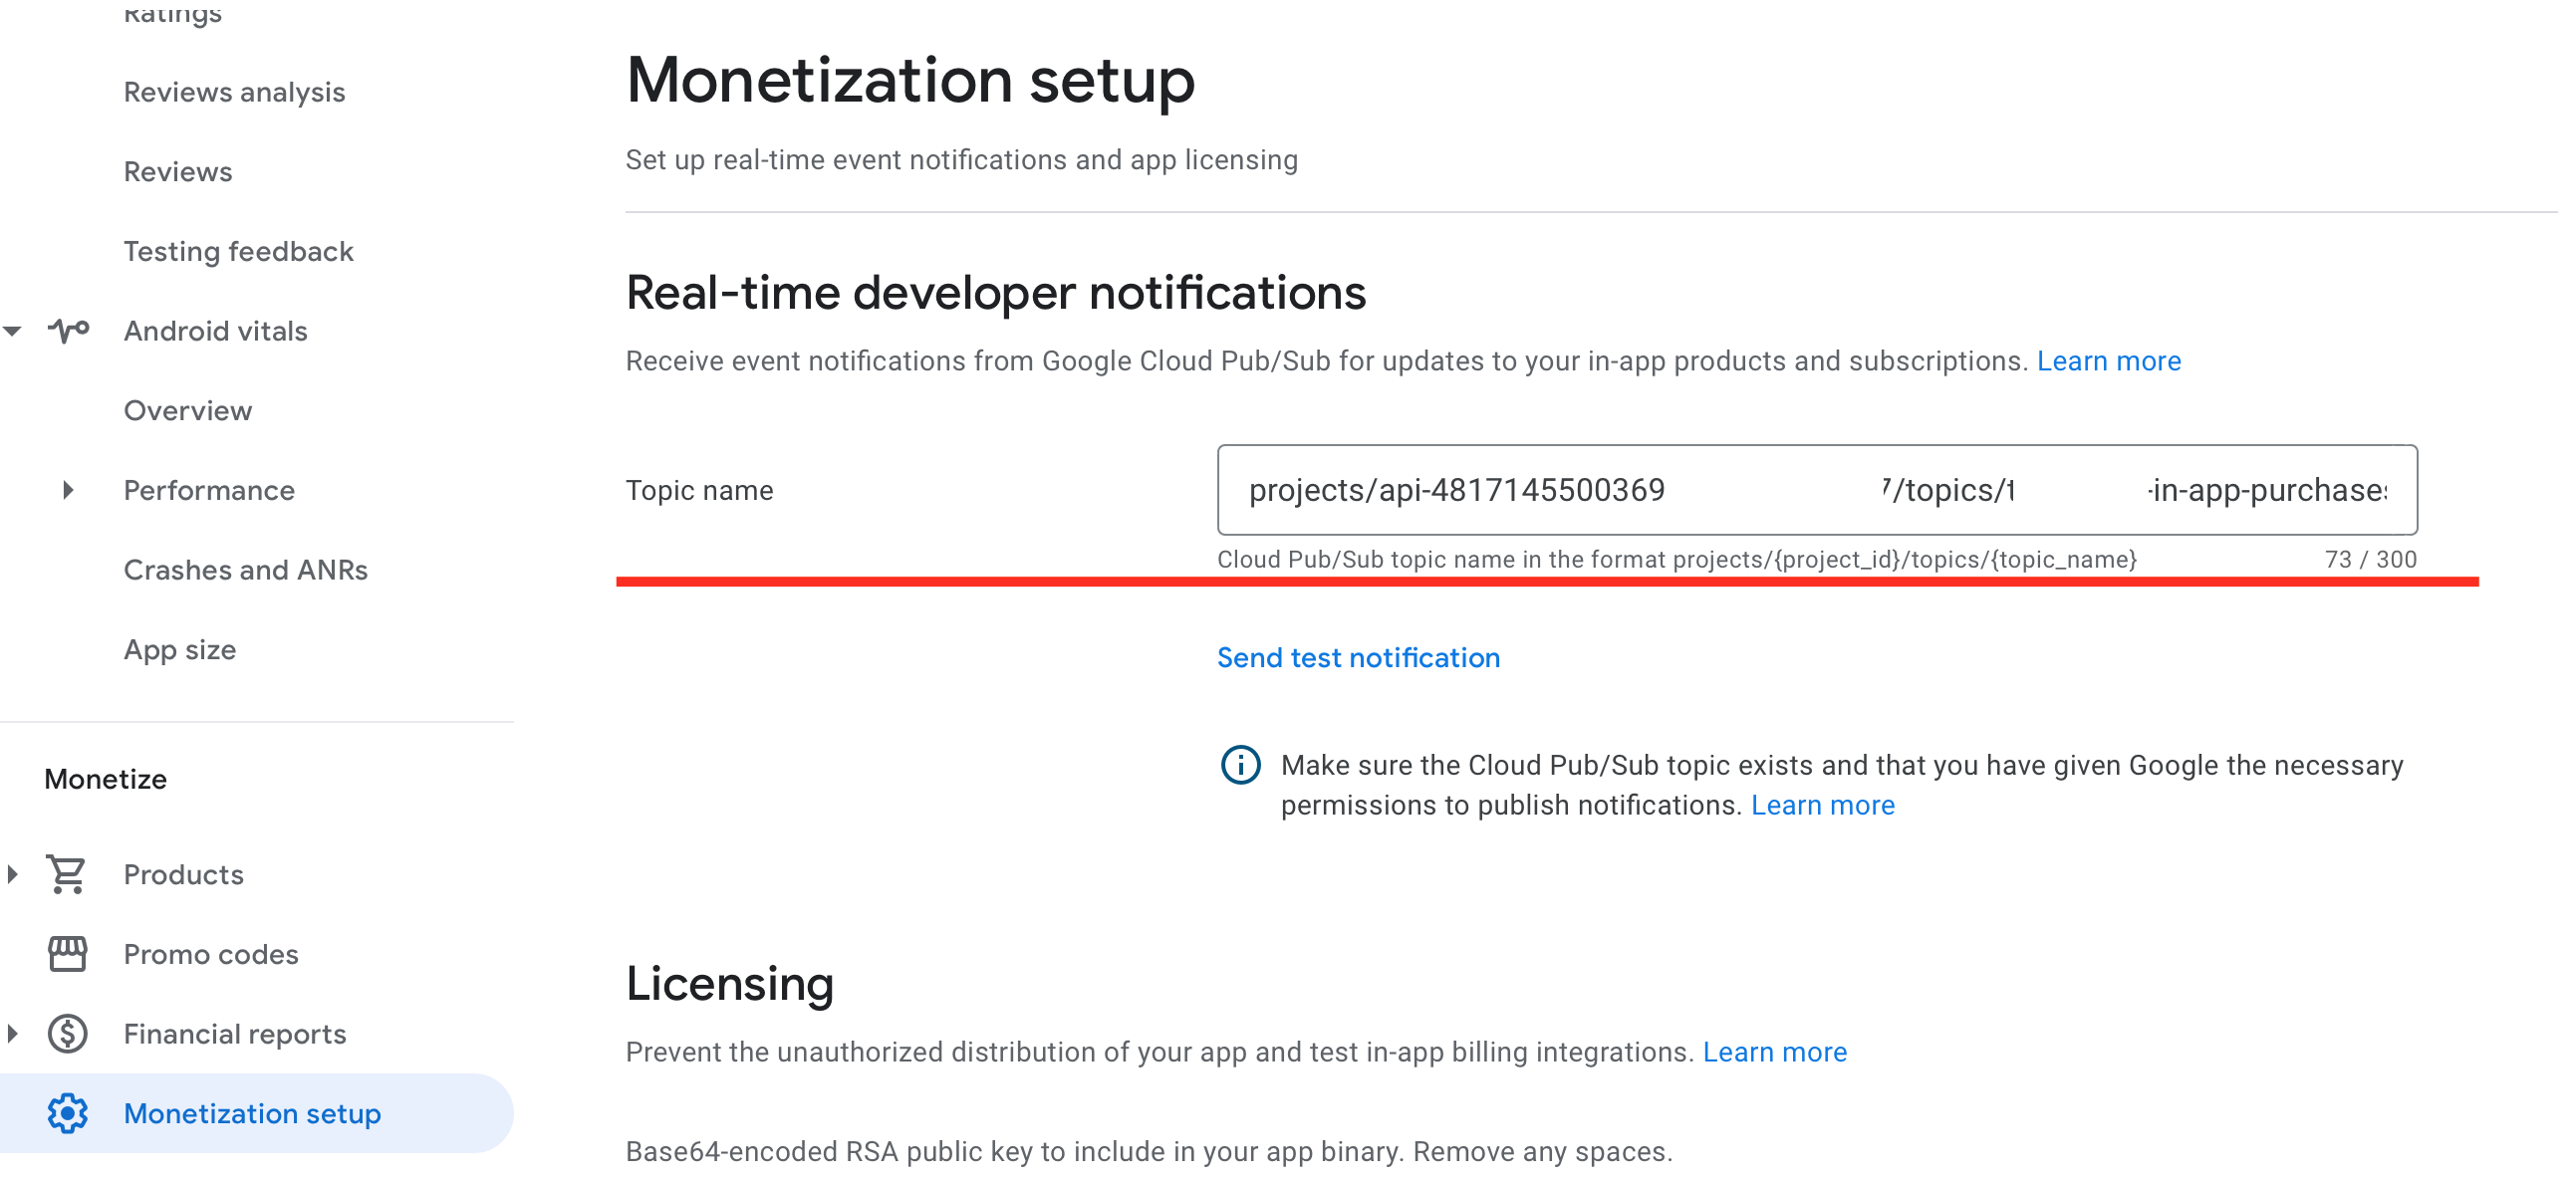
- Find the Real-time developer notifications section. In the Topic name field, enter the full Cloud Pub/Sub topic name that you configured earlier. The topic name should be in the format of
projects/{project_id}/topics/{topic_name}whereproject_idis the unique identifier for your project, andtopic_nameis the name of the topic created earlier.
2.5 Test
- Click Send test notification to send a test message. Performing a test publish helps to ensure that everything is set up and configured properly. If the test publish succeeds, a message is displayed stating that the test publish was successful. In Iaptic’s Dashboard, you should see that a new Event has been received:

- If the publish fails, an error is shown. Ensure that the topic name is correct and that the
google-play-developer-notifications@[email protected]service account has Pub/Sub Publisher access to the topic.
All good? Click Update Topic and we’re done! For more details about real-time developer notifications, see here: developer.android.com
3. Pricing
A quick note about Google Cloud Pub/Sub pricing, from Google:
Message ingestion and delivery are priced per volume of data transmitted in a calendar month. The first 10 gigabytes of usage are free. After that, the price for ingestion or delivery of messages is $40 per TiB.
Messages sent by Google Play being about 1kB, the free plan includes about 10,000,000 such messages per month, a majority of which sent when you receive a payment. The $40/month not be an issue when you reach that stage.
Ref: https://cloud.google.com/pubsub/pricing
4. Troubleshooting
Error:
The project id used to call the Google Play Developer API has not been linked in the Google Play Developer Console
Sometimes Google doesn’t apply changes you made to your account’s permissions…
Possible solutions:
- Create an In-App Product in your app, that you can delete right after.
- If that doesn't work. Give up, wait 24h and try again... It's unfortunate, but Google Play sometimes take a lot of time to propagate those changes.